Presentations, seminars and group work
What do you want to learn about?
Click on the links below to move to the corresponding section of this page:
Emmanuel and Sara talk about their presentations
- Video transcript
Emmanuel: Coming into university, there's literally little to no group work or presentations that I would need to do. But being a Sussex student, especially with product design, you're meant to try being engaged with the audience, engage with your target market. So group work and presentations is pretty much fundamental throughout our whole course. So it's something I had to adapt to again in terms of standing up and speaking to a group of people about your idea or about a process that you've been learning or doing. And for me, it was hard to adapt to at the start because I couldn't speak in front of two people, let alone 20 or 30 or 40. But with the course itself, there's a lot of help and a lot of guidance that they can give you, especially when you speak to lecturers and whatnot. They can help with you know how to pitch your voice or how to stand upright, what to include in your presentation slides and everything. And very quickly, I was able to do that and understand, okay, here's what I should do when I'm talking in front of people here's what I shouldn't do. And that carried on through first year to second year and even to final year now where I feel a lot more confident speaking among people and whatnot. And yeah, to hit your point about group work as well, there's definitely a lot of group work that we need to do. And I'm the person who does quite enjoy group work, quite enjoy teamwork. So it's something that I wasn't too afraid of, but I actually look forward to because, you know, that idea of collaboration, sharing ideas, speaking with other people as well is something that quite entices me.
Sara: I think lecturers are a great inspiration to take from presentations because that's what lecturers are doing. They're giving presentations and the way they're doing it is so well because so many students are learning from it and they have so many years of experience that they've really got it down to how you can actually do it. So I definitely took a lot of inspiration from my lecturers on how to present, even if it was something small like body language. I definitely watched a few lectures back from my favourite lecturers and I noted down how they spoke, what they said, how was the content relating to what was on the slides? Yeah, I think it really helped.
Presentations are some students’ favourite part of their learning journey at Sussex. For many, however, they are the part that fills them with dread. Read the information here to learn what to do so you are confident that you have a great presentation to deliver, and hopefully minimise your fear.
Presentations versus essays
There are many similarities between presentations and essays, so many of the skills you use when writing critical essays are also used for presentations. You need to:
- understand the presentation question
- read and research the topic
- take a position
- construct an argument and support your points
- cite your sources
- have an introduction, a main body, and a conclusion
- edit and proofread your work
Of course, there are also many crucial differences between presentations and essays. You must remember the following points:
- Your audience is less likely to be just your tutor, and more likely to be a group of your fellow students
- You'll probably be given a time limit rather than a word limit
- Since your audience can’t read your presentation, the different sections of your presentation need to be very clear
- You can use slightly more informal language when presenting, however you’ll probably have to signpost more
- While most of the information is delivered orally, you also have the option to present visual information
- Your presentation won’t end with a conclusion, because it’s very common to have a question-and-answer section afterwards
- You have the opportunity to practise your delivery several times before the actual event!
Planning your presentation
- Your audience
If your audience is other students, you need to consider what they want from your presentation. Your tutor gets paid to mark your essays whether it is interesting or not, but your fellow students aren’t paid to watch your talk. If you want to make it successful, you need to hold their attention. You can do this in many ways: starting your presentation with an interesting idea, incorporating engaging visuals, including helpful signposting language, and using confident body language, tone and eye contact.
 Sussex students giving a presentation
 - Time limit
The time limit will determine exactly what level of detail you can go into for your talk. It’s likely that you'll be asked to speak for less than 20 minutes, especially if all students are giving presentations. Just as you divide critical essays into sections and apportion a number of words to each, divide your presentation into sections and dedicate an appropriate amount of time to each. The main body should always be the longest section.
It can be helpful to think about the number of slides for each section, which can be a rough guide to the amount of time you dedicate to each one. Here is a basic template:
Opening (1 slide)
Introduction (1 slide)
Main body (3 - 5 slides, depending on the length of the presentation)
Conclusion (1 slide)
Reference list (1 slide)
Questions (1 slide)
If you find your talk is too long, work out what can be cut. Remember to leave time for questions.
- Sections
The classic advice for presentations is:
- Tell the audience what you're going to tell them.
- Tell them.
- Tell them what you told them.
It may seem patronising to tell people the information three times, but it is worth reinforcing the main points so that your audience takes in the information. Perhaps you have been researching this topic for weeks, but it might be completely new to your listeners. Repeating your main points really does help get the message across.
The three points above are easily translated into introduction, main body and conclusion. We’re going to add a few more details:
Opening
Tell the audience who you are and the title of your presentation.Introduction (Tell the audience what you’re going to tell them)
- Use a 'hook' at the start to grab your audience’s attention and boost your confidence. Give a shocking statistic, an audacious quote, a captivating image etc.
- Explain what the presentation is about.
- Explain your position and the main points you will cover.
- What's in it for the audience? Will they learn something, be persuaded about something, be called to do something?
- Let the audience know if you are happy for them to ask questions throughout the presentation, or if you’d like them to wait until the end. It is easier to take questions once you have finished your prepared material.
Main body (Tell them)
- Give details of your topic in a logical order.
- Recap each section and signpost the next one.
- Use practical, relevant examples to illustrate your points where you can.
- Tell the audience how the information applies to them.
- Back up the claims that you made at the start.
Conclusion (Tell them what you told them)
- Summarise your main points.
- Explain the benefits that your solution, options, conclusions etc. will bring.
- Say what you want the audience to do next.
- Try to end on a high. Avoid saying ‘That's it.'
- Explain how they can contact you.
Reference list
Like a bibliography, put all your sources on a slide after your conclusion.Questions
Leave a few minutes at the end to give your audience an opportunity to ask questions.This section has been adapted from materials originally produced by LearnHigher CETL, which are therefore licensed under a Creative Commons License.
- Question and answers
The question section can be the easiest part of the presentation because you don’t need to have practiced or produced anything for it, so you are free to be more spontaneous. However, some students are still anxious about this part. Here are are some tips to help you prepare for it:
 Sussex students listening to a presentation
 - Have an objective look at your presentation and imagine what questions might be asked. Make notes on how you would answer them if they come up.
- It is not a test! If someone asks a question and you don’t know the answer, that's fine. Just saythat it’s a great question and the reason you don’t know. Maybe you hadn’t considered it, perhaps you didn’t research that area, or you might not have had enough time. If it’s a particularly interesting point, explain that you will look it up and get back to the questioner. Alternatively, say you do not know and ask the audience if anyone else can answer it.
- Be patient. Some audience members may ask for clarification on points that you think were very clear in your talk. Answer them clearly and generously.
- Don’t worry if nobody has any questions. It might be because they are all tired, they want to finish as soon as possible, or you explained everything they wanted to know.
- For longer talks, you can prepare a few discussion points for the end. Try to make sure that these discussion points do not require too much prior knowledge. Avoid making them so vague that people aren't sure what to talk about, or so specific that they will not generate discussion.
- Practice
Practising your presentation in advance is essential. Professional speakers never go on stage without rehearsing first, and neither should you. Going through your talk allows you to see how long it takes, which bits are tricky to explain succinctly, any words that are difficult to pronounce, and where the slides should change. It will also make you more confident in your presentation, and less reliant on notes.
You could try:
- Practising your presentation in front of a mirror
- Practising your presentation with family and friends to get some feedback
- Recording yourself and listening back.
For help with recording yourself access this YouTube video Recording PowerPoint with narration
You’ve got this!
 Activity: Signposting Language
Signposting language is a cue to inform listeners of the different stages of a presentation and to keep them engaged. It shows that you are considering the audience and helps get them on your side (there is a text only version below the activity):
- Text only version for the activity above (with answers)
The presentation stages here are matched to the appropriate example phrases in each case:
Greeting the audience - Good morning!
Expressing the purpose - The aim of my talk is to...
Explaining the structure - This presentation is divided into 3 parts.
Transitioning between sections and slides - On to my second main point,
Going back to highlight a point - Returning to the previous slide,
Giving examples - A useful illustration of this is…
Summarising points - To sum up these findings,
Concluding your presentation - So, in conclusion,
Closing the talk - Thank you for listening.
Taking questions - I’m now happy to take any questions you may have.
Visit Language for Presentations for more examples of signposting language.
Using visual aids and other tools
Adding text, images, audio or video to your presentation reinforces what you are saying. The process of creating a presentation slide deck also helps you to think through your ideas. Follow the advice in this Technology Enhanced Learning post - Top tips for designing presentations - to improve your presentations. Let's take an in-depth look at the types of visual aids:
- Choosing the right slide deck
Check the brief to see how your presentation should be delivered. PowerPoint is probably the most common presentation software in higher education. As part of Microsoft Office 365, it is available to you free of charge while you study at Sussex. See Office 365 and how to download PowerPoint.
If it doesn't have to be Powerpoint, consider which presentation tool is best for your purpose. Here are some examples:
Google Slides - Similar to PowerPoint, Google Slides is part of the same family of apps as Google Docs and Sheets. It is easy to use and multiple users can edit a presentation, so it's great for group presentations. Your slides are saved automatically and you can present directly from Google Drive.
Haiku Deck - An online presentation tool that focuses on images and design. Choose from a range of layouts, fonts and images to help you create a polished design. A free ‘Public' account limits you to three saved presentations at a time.
Prezi - A cloud-based service for presenting ideas from a virtual canvas. Individuals or groups can work online to create Prezis using text, graphics and multimedia content. Sign up with your Sussex email address to get the benefits of the free Edu Standard account.
Sway - A Microsoft presentation tool, Sway can help you to create interactive, polished presentations. You can use it on a mobile device or computer. The appearance of your presentation adapts to the screen you are viewing it on.
- Creating slides
Your slides should liven up your presentation, but you don’t want them to pull focus away from you and the information you are giving. The number one rule for slides is to keep the text short. Otherwise, it’s very easy to start reading your slide aloud, and turning your presentation into a group reading exercise. Nobody enjoys this! Don't put more text on a slide than you could read easily on a T-shirt.
Other tips for slides include:
- Use a large text: at least 28-point
- Choose a dark background and light text or a light background and dark text. Black text on white background can be too harsh and hard to read in a dark room so consider changing the background to a soft pastel.
- Avoid full sentences on your slides. One or two words as headings for your points is better.
- Use bullet points to break up the information.
- Proofread your slides carefully. Typos are even more embarrassing when they're huge.
- Wherever possible, use images and other visuals rather than text to illustrate your points.
- Don't use unnecessary or very detailed visuals, which may distract the audience. Everything you use should enhance the information.
- If you are using data, e.g. a graph, you need to cite the source on the slide.
- You could use a slide at the beginning to show the structure of the presentation.
- Make sure you coordinate between your notes and the slides, e.g. indicate in your notes where to change your slide or which number in the handout is the relevant example.
- If you're projecting your presentation onto a screen behind you, don't walk in front of it.
- Finding images
 Sussex student in library looking at a large selection of books
 Images help to grab your audience's attention, but you have to make sure you have permission to use them. Fortunately a lot of people apply Creative Commons licenses to their images so that others can use them.
You can use Flickr to find Creative Commons images - select the Advanced Search option to filter your results by the various Creative Commons licences. The handy CC Flickr attribution tool allows you to quickly attribute images.
Photosforclass.com will let you search Flickr for CC-licensed images, then embed the attribution at the bottom of the image.
Microsoft Word enables you to find CC-licensed pictures. Go to Insert > Online Pictures to search Bing, selecting ‘Creative Commons only'.
- Handouts
Handouts aren’t necessary, but you may want to include one at the end of your talk. The handout should be a summary of the important points rather than all of your presentation notes
- Put the title, your name and the date at the top. Give information in bullet points.
- Use headings to show the different levels of information (main points, supporting points, examples).
- Cite sources where appropriate. Give a bibliography at the end of the handout, using a standard bibliographical style.
- Include important material, e.g. definitions, tables, illustrations.
- For a 20-minute talk, 2 - 4 pages should be enough, depending on how much data there is. If your handout has no data, aim for 2 pages.
- Make enough copies for everyone. Bring them stapled, hole-punched and ready to use.
- Video or audio clips
Video or audio clips can be useful but use short clips (under 2 minutes) so they do not dominate the presentation. Embed the links into your slides and practise presenting the clips beforehand.
- Activities
At the start, it can be helpful to ask your audience questions to engage them. It helps you find out what the audience already knows so you can pitch your presentation at the right level.
You might want to include activities such as audience participation, role play or games. Consider how you will get your audience to participate, and what you will do if they refuse. If you're planning activities like this, check with your tutor first.
Delivering your presentation
Reuben and Sara give tips and advice for presentations
- Video transcript
Reuben: By the end I was, having done quite a few of them and getting lots of advice, was like if you've got slides, making sure that you also refer to them and always practise beforehand. And yeah, try not to fidget too much when you're doing it and just be prepared. Be prepared and have stuff written in front of you if you feel like you're going to freeze up. Have it in bullet points as well as written out, if that's what you need. Remember to keep engaged with the audience when you can and yeah, remember it has to have academic content. So you can kind of still think of it a bit like your essay, but like a bit broader and a bit more creative with visuals. So don't forget, you've still got to get your academic points in there and your references, and everything needs to be referenced on the slides behind you, and that you can still make a really good argument like you would in your essays, but bring it together in a more rounded, creative presentation way.
Sara: So I've given two presentations throughout my university life, and both of them have been individual, so it was kind of very reliant on me. I think how I approach presentations is to make them very simple, to make sure that I'm not just giving a lot of information to my audience that they just won't be able to understand because there's just so much of it. And I make sure I boil it down to a few simple points that I really want my audience to know. And also, I think something important is to not read off the slides, because if you're presenting and it's all on the slides, then you're basically just a narrator of the same thing. So I make sure that I kind of explain my thought process behind putting those points in. But then what I'm saying kind of explains it a bit more than what's on the slides.
The big day has arrived! Hopefully you have planned a great talk that you are happy with and have practised several times. You know your material well and are confident with the timings.
Things to DO and NOT TO DO for delivering presentations:
DO:
- Smile and show your enthusiasm. It can help to cover up nervousness.
- Turn all your mobile devices to silent.
- Position yourself where all of the audience can see you easily and you can see them. Stand up if you are able.
- Address the whole audience, not just one group or the tutor.
- Maintain eye contact with your audience. Make sure you are facing them when you speak.
- Speak clearly at a natural pace and loud enough for all to hear.
- Prepare some cue cards with bullet points to support you.
- Place your cards face down in a neat pile as you finish using each one.
- Pause from time to time - for natural breaks and to keep the audience attentive.
- Have a watch or clock in view – and check it.
DON'T:
- Read your presentation. It may be necessary to read out your examples if some of the audience has trouble seeing them, but that's all.
- Move about while talking. Find an anchor to speak from, e.g., a podium or a chair to stand next to.
- Stand in front of the screen while it's being used.
- Turn your back to the audience (e.g., when pointing at visuals).
- Gaze out the window or over the audience's head.
- Play with pens, notes, clothes, your fingers or your hair while talking.
- Get diverted into a discussion with a single member of the audience during the presentation or in the Q&A section.
Evaluating your presentation
It's a good idea to evaluate each presentation after you deliver it so that you can improve next time. Ask yourself these sixteen questions and mark yourself out of 5. Then, identify three aspects that you would like to improve next time. How can you make sure you do better in these aspects? It may involve deeper research, better planning, or more practise beforehand.
| Aspects of my presentation | How well did it go?1 (terrible), 3 (okay), 5 (great) |
|---|---|
| Did I engage the audience from the beginning of my talk? | 1 2 3 4 5 |
| Did I inform the listeners of the structure of my presentation at the beginning? | 1 2 3 4 5 |
| Did I stick to the structure? | 1 2 3 4 5 |
| Did I inform the audience when I would answer questions about the presentation? | 1 2 3 4 5 |
| Were my main argument and ideas clear to the listeners? | 1 2 3 4 5 |
| Did I use signaling language throughout? | 1 2 3 4 5 |
| Did I stick to the time limit? | 1 2 3 4 5 |
| Did I rush through any parts? | 1 2 3 4 5 |
| Did I forget any parts? | 1 2 3 4 5 |
| Did I use my cue cards effectively? | 1 2 3 4 5 |
| Did I make good eye contact with the audience? | 1 2 3 4 5 |
| Was I talking loudly and clearly enough? | 1 2 3 4 5 |
| Did I mispronounce any words? | 1 2 3 4 5 |
| Did I appear confident, even though I may not have felt it? | 1 2 3 4 5 |
| Did I seem enthusiastic about the topic? | 1 2 3 4 5 |
| Did I answer the questions well? | 1 2 3 4 5 |
You can download this list as a Word document or PDF to print out or to save for future use.
(Important: The PDF will open in this window so remember to click on the browsers back button to return to the Skills Hub).
Seminars
Taking part in seminars and working with other students is a crucial aspect of university studies. It often involves discussing the material presented in lectures or assigned readings as a group.
 Sussex students in a seminar
The point of seminars is often not to teach anything new, but instead to discuss and think more deeply about what you have learnt in the past week’s lectures and readings. To get the most out of the session, you need to come prepared with your lecture and reading notes, and opinions about what you studied. Don’t expect the tutor to fill you in on information that you should have already gathered. However, it is perfectly normal and expected for you to have questions about the information. Feel free to ask your tutor and other students for further details on a point, clarification of an argument or examples of a process so that you feel comfortable with the material.
To prepare well for a seminar:
- Check your module information on Canvas and make sure you have done the required preparation. (For example, you may have set seminar discussion questions and texts to read or you may want to listen back to a related lecture on the topic).
- Make notes on the key points or issues in the materials set by your tutor. Note any points you find difficult or confusing. If the difficult bit is in a video or audio recording, write down the time it occurred so you can find it again.
- Read around the subject for your seminar and think about it. How does it relate to what you already know about the topic? What questions do you want answered? How might you contribute to the seminar discussion? Prepare some notes of your ideas, questions and thoughts
- attend the lecture or watch recordings with other students and discuss the key themes to gain a clear understanding.
Being a good listener
To make the most of seminars you will need to both participate in the discussion and listen to others. Be open to hearing something new or something you disagree with. Respect the views of students and tutors, you may not agree with them and may wish to challenge or clarify their points but listen carefully first
- Show your interest - make eye contact, smile and nod.
- Try to avoid interrupting – if you're interested in something someone is saying, wait until they finish to tell them or contribute your own point.
- If you don't understand something, then ask. For example: "do you mean...?" or "I don't quite understand why...." to help clarify things.
- Learn to listen to opposing views. Try to think about things from other peoples’ points of view and accept that you may not agree.
Dealing with nerves
The thought of speaking up in seminars can generate worry and anxiety. The anxiety can build so that the idea of expressing your views in class can feel very exposing. Spending a whole class worrying about the prospect of speaking up can be very distracting and disrupt your learning.
Working out some strategies before the start of a new module will help you to deal with these worries and help you feel more confident to speak up. With a bit of planning before a class starts and some self-reflection afterwards, you might even find that expressing yourself in class can be something you look forward to and enjoy at university.
- Strategies to help you feel more confident
1. Introduce yourself.
If you make an effort to get to know your classmates you will feel more at ease with them in the weeks ahead. Talking with them before and after the seminar can help you feel more relaxed during classes. Remember that other people may be feeling anxious too.2. Make a decision to speak.
Make a decision to speak at least once during the first class you attend for a module. This could be asking someone for clarification on a point, or agreeing with someone when they make a point that fits with your view. Don’t decide to wait until you feel comfortable in the group before you speak up; this can end up making it feel harder to contribute.3. Go in prepared.
Go in with some points prepared. Have them written down as bullet points if you worry about remembering them.4. Make a point at the beginning.
Make a point at the beginning of the seminar. The longer you leave it to speak up, the harder it can feel. If you contribute early on, you will feel more relaxed afterwards, and hopefully more confident to speak up again.5. Act confident.
Act as though you are confident, even if you don't feel it. We often overestimate how visible our internal emotions are to other people. It’s possible to feel nervous and look confident at the same time!6. Be brief and don’t bluff.
When you have made your point – stop. If you don’t know the answer to a question, it is fine to say so. There is no need to pretend you’ve thought of everything. You are there to learn. Sussex students giving a presentation
 7. Be assertive.
Don’t be afraid to be direct. You don’t need to qualify your ideas with phrases such as ‘sort of’ or ‘I might be wrong’; let your ideas make an impression.8. Listen.
If you tend to worry about being picked on to speak, you can get stuck in your own head and end up missing interesting points. Make a conscious effort to be present in the room and focus on other people. This way you are more likely to come up with good responses when needed.9. Don’t engage in mindreading.
‘What if they thought my point was too obvious?’ You can’t control how others see you. So don't waste too much energy trying. Someone who is frowning while you’re speaking might be thinking hard, formulating a response, or they might just have a headache!10. Notice group dynamics.
Seminars consist of groups of individuals – sometimes these groups might ‘click’ and the dialogue between people flows. At other times, conversations can be stilted and feel awkward. If this happens, remember that it is neither your fault, nor entirely up to you to fix. If things are not flowing comfortably in your group remember it is natural for communication to falter from time to time.11. Balance listening and speaking up.
If you often speak in seminars, be mindful each week of how much ‘airtime’ you are taking up. Holding back now and again creates space for other people to express their views, which could be points you have never considered before.12. Congratulate yourself
After the seminar, congratulate yourself if you managed to speak up. Note how it felt and reflect on it. If you didn't speak, don't worry. Plan to speak next time.
All members of a seminar discussion group have a responsibility to enable the discussion to develop.
Complete the checklist below after your seminars. What went well? What could you try to improve on next time?
| Yes, I'm happy with this | I can do this better in future | |
|---|---|---|
| Did I prepare for the seminar? | ||
| Did I contribute to the seminar discussion? | ||
| Did I listen to others? | ||
| Did I comment on what other people said? | ||
| Was I supportive of other people, even if I disagreed with them? | ||
| Did I ask questions? | ||
| Did I refer to my notes? | ||
| Did I invite others to speak? | ||
| Did I wait until others had finished speaking before I spoke? | ||
| Did I make any suggestions? | ||
| Did I sum up what I said if I spoke for a long time? | ||
| Did I feel confident? |
You can download this list as a Word document or PDF to print out or to save for future use.
(Important: The PDF will open in this window so remember to click on the browsers back button to return to the Skills Hub).
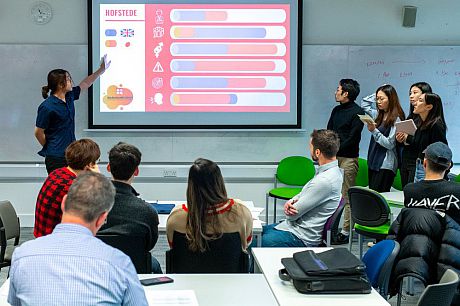
Working in groups
At Sussex, you are expected to actively take part in and contribute to group seminar discussions. You are also likely to be set group work and projects too.
Georgia and Tavian talk about group work experiences
- Video transcript
Georgia: There are definitely challenges in working in a group. You have so many ideas that are being put together. Hopefully - that's another challenge is that there aren't ideas coming together! But if you have so many ideas coming together, it's normally too many that you could do on whatever assignment or project that you're doing and learning to both like the ideas and incorporate other people's ideas and also be able to let go of your own, even if maybe you think your idea would have worked a bit better or something like that. Incorporating lots of people's ideas and coming up with something that you're all proud of, I think is probably the best way to get over that. But it's definitely not easy.
Tavian: Yeah, I think I've always been relatively comfortable with presenting. I had to do more presentations in first year. I have one coming up actually, soon, in a couple of weeks, but they're mostly, well, they're all group presentations. I've only done one individual presentation - that was in Spanish, so it was a bit different. But having to work with a group and figuring out, you know, okay, you know, we've got 10 minutes to fit everyone in, and I think that's the biggest challenge, working as a team. But I find that in a lot of what I've done has been group work and that has always been for me a key take-away from my experience, is learning how to work in a group, in a team, with people you don't know. But then as you get to know people, you know, be like, okay, you're good at that, I'm good at this. I'm going to do this part. You'll do that part. But specifically for presenting, I think really just making sure that everyone is contributing and everyone has, you know, okay, I'm going to speak about this. I've got a minute and a half. Everyone's practised it, practised it as a group. So then when you're going to actually do the presentation, you're not that nervous because you know you're prepared. And I think that's sort of the key for anything when you're doing something live, when it really matters, is making sure that you're just prepared for it, because then your nerves aren't going to be near as bad as if you're just winging it.
Group work provides many benefits, such as:
- Learning from others
- Considering alternative views and perspectives
- Supporting your peers
- Accommodating different types of students
- Developing communication and interpersonal skills
- Challenging yourself and growing in confidence
- Taking responsibility for meeting a group goal
- Replicating real-world employment scenarios
An effective group works together to complete a task in an agreed time, with each member contributing to the team according to their skills, experience and personality.
 Sussex students working together
These guidelines should help you make a good start on your task:
- Make a plan so that you know what each person should be doing and when. Break it down into small daily tasks to make things easily achievable.
- Get to know everyone in your group. Establishing good working relationships makes a project much easier than coordinating a group of strangers together.
- Get to know your own role in a group. Do you tend to lead? Stay focused? Have lots of ideas? Help resolve differences? Understanding your own strengths and weaknesses helps in planning where you can best add to the group.
- Remember that everyone is different, everyone has their own opinions and ways of working and everyone is valid. Make sure all group members feel heard or resentments can grow.
- Make sure that you all understand and agree on the task brief.
- Discuss your approach to the task and brainstorm ideas for each stage.
- Assign people roles for each section or stage of the task. Everybody needs to be clear on what they are supposed to do (and when).
- Usually, it is a good idea to appoint a group leader to coordinate what people are doing and make sure they are on track.
- What will you do if someone is sick, leaves the group or can’t complete their section of the task? Build in some time to your plan to accommodate for such issues.
- Organise regular group meetings to allow people to discuss their progress, look at the direction of the project overall, and highlight any possible problems. Decide on a time and day which everybody can make.
- You might want to assign someone the role of secretary to record what is decided in meetings and send notes to everyone.
- You will have a final deadline for your task. Consider adding mini deadlines for each stage to help you keep to your plan.
The most important advice on group work is: expect problems! Working in groups inevitably means that delays and misunderstandings occur. This is part of the point of group work – learning to overcome issues and developing as you do so. There will be someone who does less work than everyone else, and there will probably be more than one person who feels they did more than everyone else. Unless it is very serious, let it go and enjoy the process. Working on a presentation for one or two more hours than someone else isn’t really worth losing friendships or sleep over. Learn what you can and strive to improve in the next group task.