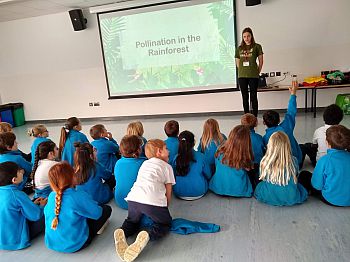
Pollination in the Rainforest
Developed by Julia Kozlowska 
This is a conservation-focused activity designed to teach pollination and pollinator conservation to young children.
It involves a fun competitive game where children familiarise themselves with the process of pollination first-hand, helping to solidify their learning. The lesson engages children’s environmental consciousness and creative thinking, whilst getting them to propose solutions to conservation issues linked to pollination. There is an option at the end to provide children with wildflower seeds to plant in their area so they themselves can help conservation.
The lesson below was designed to suit early KS2 levels, beginning with the topics of pollination and animal adaptations.
Student´s Prior Knowledge
By Year 3, students should be aware of:
- The basic structure of plants
- The name of common wild and garden plants
- Describe how seeds and bulbs grow into plants
- Identify the adaptations living things have to their habitat and how animals and plants depend on each other
Session Aims
- To explain flower structure and pollination
- To introduce different pollinating animals from the rainforest and their adaptations to different flowers
- To allow children to play a competitive game lets them get involved in the process of pollination
- To discuss conservation issues concerning pollinators and rainforests with the children
- To aid the children in getting involved with a conservation action by providing resources
Learning Outcomes
The activity includes the KS2 National Curriculum topics of flower structures, pollination and deforestation.
By the end of the lesson children should be able to:
- Identify basic flower structure
- Describe how pollination works
- Be able to name some rainforest pollinators
- Identify one key reason for pollinator decline in the rainforest and one in the United Kingdom
- Explain one way to help pollinators
Timings
- Total time: Optimized for 60 minutes, although the session can be condensed into 45 minutes, if fewer questions are asked, and less time is provided for discussion
- Introductory presention with slides and questions: 10 minutes
- Game set up: 10 minutes
- Pollination game: 15 minutes
- Conservation slides: 10 minutes
- Assessment session: 10 minutes
- Packing up: 5 minutes
Materials and set up
 |  |
|---|
See a list of materials here. Use a hall or a classroom and move all the objects to the side of the room. Children should be seated on the floor at the front of the room, facing the screen.
Introduction
- Slide 1: Ask children to name the main structures of a flower required for pollination and explain these: petal, stigma, stamen with pollen and nectar location.
- Slide 2 series: Describe the basic concept of pollination – the pollinator flies to one flower to eat nectar or pollen. Pollen becomes accidentally deposited on its body. Then, it visits another flower and accidentally deposits some pollen on the stigma. Explain that the flower has been “pollinated” and the process is called “pollination”; children should repeat key words.
- Slide 3: Introduce some tropical rainforest fruit we get through pollination, that the children will recognise; for example, mango, coconut, passion fruit, papaya.
- Slide 4-5: Introduce the concept of different animals as pollinators in the rainforest and get children to discuss in groups the key differences (adaptations) between flowers pollinated by bees and by birds (colour and shape)
- Slide 6: Introduce the game, explain the purpose of the activity and items used, and demonstrate the rules using a few volunteers or teachers.
- Assessment questions: See ‘Suggestions for Assessment’ section below.
The Pollination Game – Set up
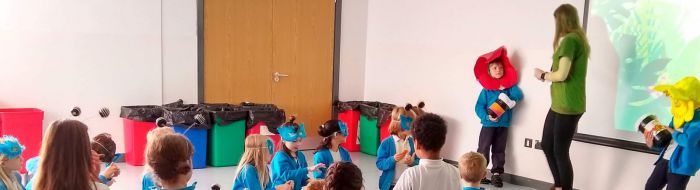
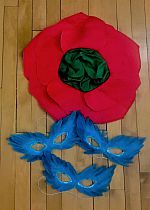
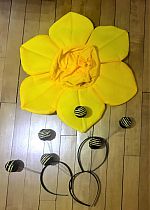
Devide the children into two teams: hummingbirds and bees. Two children from each team become the flowers for that team. The rest become pollinators. Each child wears an appropriate costume. Pollinators wear a winter glove on their dominant hand. For each team one flower holds a cardboard tube with a bag inside which holds nectar tokens and ‘pollen’ (HOLI One non-toxic powder); this tube has the picture and name of a stamen on it. The second flower for each team holds a tube lined with white fabric, with a bag containing nectar tokens. This tube has a picture and name of a stigma on it. In each group, one flower stands on the opposite end of the classroom to the other. To correspond with adaptations learned earlier in the lesson the bee pollinated flower costumes are yellow and the hummingbird pollinated flower costumes are red. The rest of the children in a group line up in the middle, between the flowers.
The Pollination Game - Rules
One child in each group receives a relay stick. This child has the task of running to the first flower (stamen) and collecting a nectar token from the tube. They then pass the relay stick to the next person. Repeat for all children in group. Once done, the relay stick returns to the first person again, and the activity repeats, this time with children running to the second flower (stigma). The game ends after 15 mins. The winning team is the team which finished first or has the most nectar tokens
At the end of the game, get the children to point out the pollen on their gloves and the white fabric and explain how this relates to pollination.
Let’s Talk About Conservation!
To finish the session, as the children to sit down again a go through a fewmore slides.
- Slide 7: Explain that pollinators are under threat for a range of reasons. Introduce the topic of deforestation.
- Slide 8-9: Get children to compare some pictures of parks and gardens to their own local parks and gardens – do they look more like the pictures of grass and patios or diverse wildflower meadows? Use this to introduce the threats pollinators are facing in the UK and ask the
children for ideas to help the pollinators. - Slide 10: Introduce the take-home activity – scattering wildflower seeds in their garden, local park or school in spring. Provide the seeds and encourage them to plant them.
Feedback and Assessment
Here are some suggestions for getting feedback and measure the success of the activity:
- ‘Before and After’ Test of Knowledge
Create multiple choice answers for key definitions from the session. Before and after the session ask children to close their eyes and put their hand up for the definition that they think is correct, for example, for "pollination" or "deforestation". Compare the number of hands up for the correct definition before and after the session
- Multiple Choice Test
Hand out a very simple multiple-choice questionnaire which assesses knowledge gained from, and enjoyment of, the session
- Feedback from teachers
If the session is led by a member of staff outside of the class’ daily teacher, a questionnaire can be handed out to the teacher at the beginning of the session to acquire feedback on how appropriate the activity was for the class. The questionnaire can also enquire how well the teacher believes the children followed the activity and if they are likely to get involved with conservation after the session.