A Practical Workshop Exploring Insect Pollination and Pollinator Decline
Developed by Rosini Selvabasgaran
This workshop is designed to highlight the importance of studying pollination and conserving polinators. It also offers secondary school students the opportunity to develop microscopy skills while expanding on KS3 National Curriculum topics in pollination and plant reproduction.
The workshop consists of two activities. After an introduction, the first activity is a quiz, where students use compound microscopes to identify different species of pollen grains. In the second activity, students prepare their own pollen slides.
The protocol detailed below is suitable for all KS3 year groups (Years 7-9).
Prior Curriculum Knowledge:
Students are first introduced to the idea of pollination in Year 3 (KS2) and are taught asexual and sexual plant reproduction in Year 5. In KS3, students should be able to:
- Recall the process of plant reproduction by insect pollination
- Understand the importance of insect pollinators in human food security
- Be aware of the recent decline in pollinating insects
- Use compound microscopes
Workshop Learning Objectives:
- To understand the importance of insect pollinators
- To identify pollen grains using a compound microscope
- To apply core microscopy skills by preparing a pollen slide
Timings of Delivery:
Approximately 60 minutes including setting up equipment and packing away.
Setting up: 15 minutes
Introduction: 5 minutes
Pollen grain identification quiz: 20 minutes
Feedback answers to quiz: 2 minutes
Demonstration of preparing a pollen slide and instructions: 5 minutes
Preparing a pollen slide and observation: 15 minutes
Plenary to wrap-up: 3 minutes
Pack up: 5 minutes
Set up for class of 30 students (adjust according to audience size): 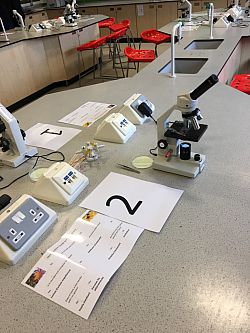
(here is a list of materials)
- Set up 10 stations with equipment for activities 1 and 2. In each station, place a compound microscopeeach with one of five species of pre-prepared pollen grain slides for activity 1.
- At each microscope, place a large printed number to serve as station label, and an identification key (see below).
- Set up 5 extra microscopes around the lab (these will be used for activity 2).
- At each of the 15 microscopes, place a large petri dish containing a glass slide and a cover slip.
- Distribute 10 small petri dishes, containing glycerine jelly, evenly around the lab.
- Place watchmaker forceps and lighters around the lab.
- Place 1 flower from the bouquet for every three microscopes. These flowers will provide the pollen for activity 2.
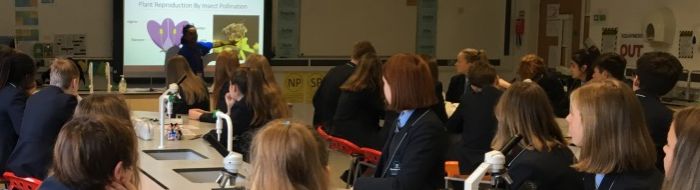
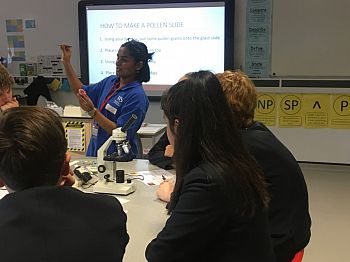
Introduction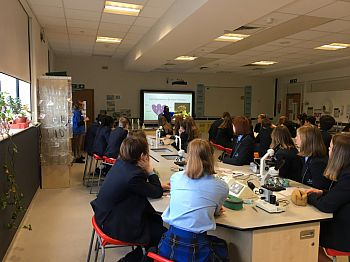
- State learning objectives and cover knowledge needed to understand workshop activities using a PowerPoint presentation (feel free to email us for an example presentation)
- Explain the first activity to students (you could use a background story about Buzz the bee who is having difficulty foraging or a similar story).
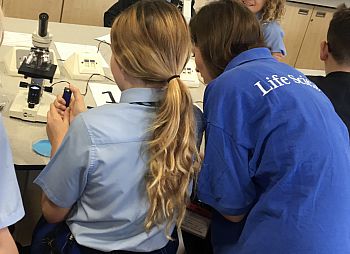
Activity 1 – Help Buzz the Bee!
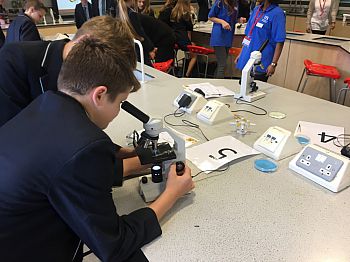
- In groups of three, students start at any station. There are 5 stations, labelled 1-5, repeated twice in the lab on each bench, to accommodate 30 students.
- Students have 4 minutes at each station to focus microscopes and use identification key provided to identify pollen grain species (here is an example identification key)
- After 4 minutes, timer will ring and students move clockwise to the next station. Students should visit all 5 stations.
Identification Quiz Feedback
- Ask students which species of pollen grain is at each station (as a formative assessment of student ability to focus microscopes and use identification key).
- Explain to students the importance of pollen identification for beekeepers in pollinator conservation.
 |  |
|---|
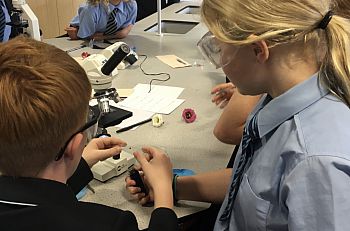
Activity 2 – Prepare Your Own Slide
Laboratory Policy: Students should wear goggles and tie hair back when preparing pollen slides. Supervise students when using lighters.
1. Carry out a demonstration for students on how to prepare a pollen slide:
- Put on goggles and source some pollen from the anther of a flower using forceps
- Place the pollen on a glass slide
- Using forceps, place a small amount of glycerine jelly on the slide
- Melt the jelly using a lighter, by placing the flame under the slide
- Place a cover slip on top once you see the jelly starting to melt
- Observe the slide under a microscope
2. Students work in pairs to prepare slides.
After activity 2, students should dispose of glass slides in a ‘used slides’ container.
 |  |
|---|
Plenary
- Summarise the workshop and reflect on learning objectives set at the start of the session.
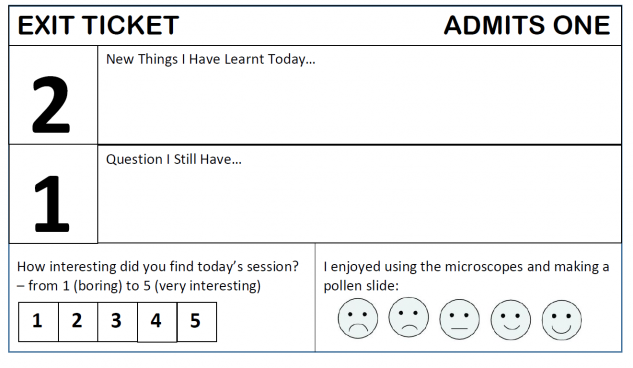
- Linking back to pollinator conservation, talk about how we can help local bees and mention initiatives in Europe to help pollinating insects. Collect student feedback whilst packing up - see an example of a "feedback pass" below. Get teacher´s feedback on the activity using a formal questionnaire.
Acknowledgments
We would like to thank Shoreham Academy, where this workshop was originally tested.