Managing channels
You will only see this tab if you are an editor for one or more channels. If you do not see this tab then you do not need to read the following section of this manual.
Selecting the channel to manage
When you select the Channels tab you will be offered a list of all the channels that you can manage. How many you see will depend entirely on how many channels for which you’re an editor.
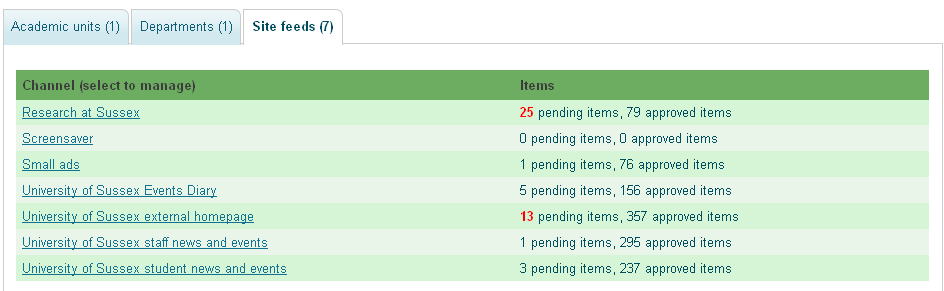
If a particular channel has a lot of pending items then the count will be highlighted.
Channels are grouped in to types so you may need to select a particular tab (‘Academic units’ or ‘Site feeds’, for example) before you see the channel you want to start managing. You can select a channel by clicking on the channel name.
Once you’ve selected a channel and you want to manage one of your other channels, select either the main ‘Channels’ tab or the ‘List channels’ sub-navigation option.
Pending items
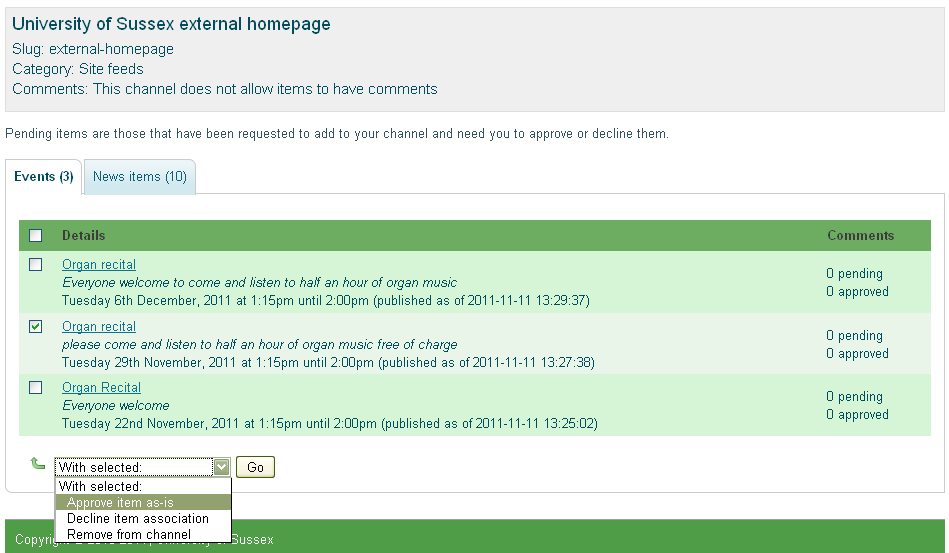
Once you’ve selected a channel to edit you will be taken to the list of pending items. It is set up in a very similar way to the ‘My items’ list with the items being grouped by type, a checkbox next to each that allows you to perform various actions, and the item link allowing you to read the full information.
Approving items
From the pending list, select the items you want to approve for display on your channel by clicking on the checkbox next to each of them. Then from the drop-down list select the ‘Approve item as-is’ option and click on the ‘Go’ button.
When you approve an item the person who added it to Broadcast gets an email to let them know that you have approved it for the channel you’re editing.
Declining items
If you do not wish to associate a pending item to your channel then you can decline that item by selecting the checkbox next to it (or any number of items) and selecting the ‘Decline item association’ option and clicking on the ‘Go’ button. When you do this you will be presented with a pop-up box that allows you to select a reason for declining the item.
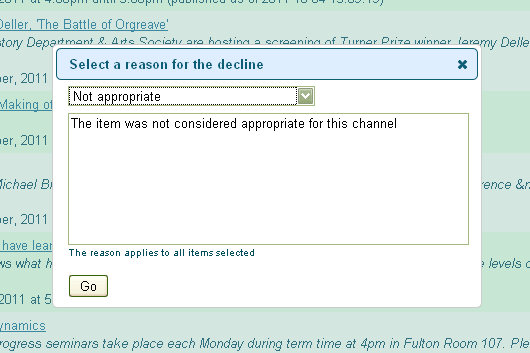
You can opt not to enter a decline message – in which case you’d just click on the ‘decline’ button, or you can enter your own reason as to why you’re declining the item. Alternatively, you can select from the dropdown list of pre-defined reasons. If you select one of the reasons the text will be displayed in the text area. You are free to alter that text if you wish; you don’t have to use exactly the pre-defined reason text.
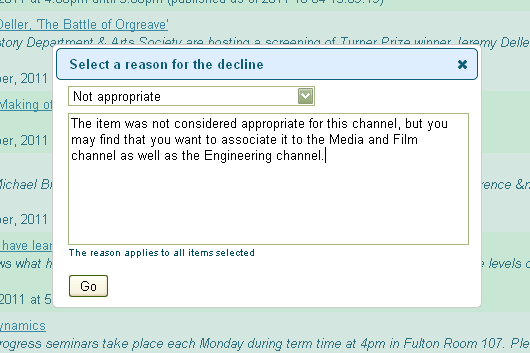
When you decline one or more items, the creators of those items will receive an email telling them that you have rejected the association to the channel you’re editing as, if you’ve entered one, the decline message.
Approved items
The approved items list should be looking very familiar by now! It works just like the other item lists – selecting the title to view full details, items grouped together by type, etc.
From here you can select to remove one or more approved items by... yes, you’ve got it! Selecting the checkboxes of the items you want to remove and then selecting the ‘Remove item’ option from the drop-down list and clicking on the ‘Go’ button. And as with the other lists, repeat this for each type of item you want to remove (i.e., select the events you want to remove and click on the ‘Go’ button, then select the news items you want to remove and click on the Go button, etc.)
Archived items
This lists all the items that owners have selected to archive. This list works exactly the same way as approved items.
Expired items
As with archived and approved items but lists those that have expired and were not selected to be archived. You can remove items from the channel via the expired tab in the same way as the archive tab.
Add other items
Sometimes you may come across an item that someone has added to another channel and you’d also like it on the channel you’re managing. You can do this by using the search facility on the ‘Add other items’ sub-navigation option.
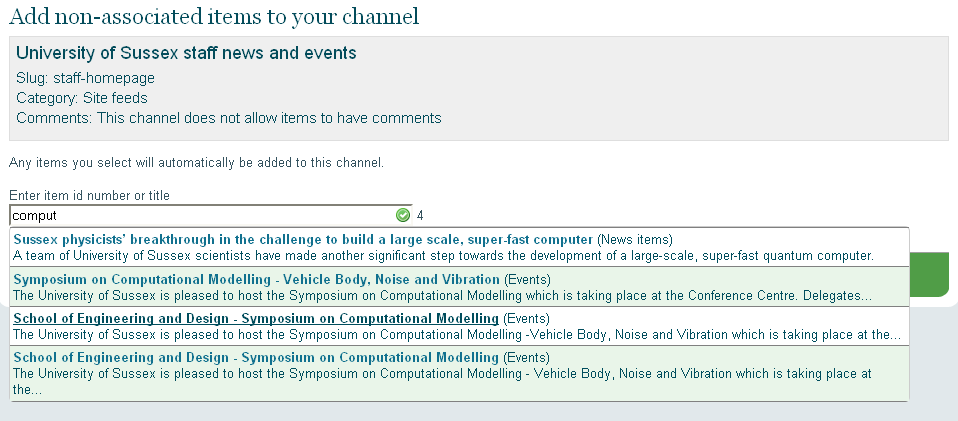
Just start typing the title or id of the item you want to add to your channel and any matching results will be displayed in a list. Select the item from that list and it will be added to your channel.