How to...
Moving files between computers
Staff and students often need to transfer documents or programs from an IT Services computer to their home computer or another computer on campus.
The methods of doing this described below are for Windows PCs, however, the general techniques can also apply to other systems such as Apple Macintoshes.
You might need to install additional programs on your computer to follow some of these instructions. General information on this topic is available at:
- Downloadable Software for Windows PCs
- software for your own computer
Optical discs
New PCs generally now all have the ability to write optical discs (CDs or DVDs) as well as read them. There are two types of disc you can use:
- CD-R / DVD-R
- Once a section of this type of disc has been written on to store files it cannot be reused. When you write to the DVD-R you can "close" it so that no more files can be added, or leave it "open" so that further files can be added if there is sufficient room.
- CD-RW / DVD-RW
- The type of disc are rewritable and so they can be reused.
There is an IT Services guide to using the IT Services PCs to write optical discs. This can be found online at:
- Writing CDs
- How to write CDs and DVDs
Flash memory
USB "sticks" or "pens" are solid state devices that enables files to be moved from one computer to another.
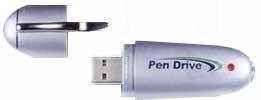
These devices easily fit into your pocket and are simple to attach to any computer that has a USB port. They can be used to move files between a home PC and one on campus or to move files between a PC and an Apple iMac. The devices come in a range of capacities from 128MB to 2GB.
When connected to a computer, the drive can be used in the same way as a disk.
Anyone who has a flash drive may attach it to an IT Services computer if there is an easily accessible and available USB port on the front of the computer.
- PC
- The oldest Dell PCs have a USB port on the front of the system unit that can be used. It is under the flap along with the headphone socket:
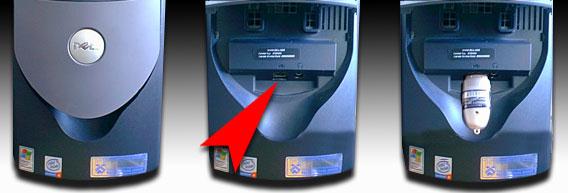
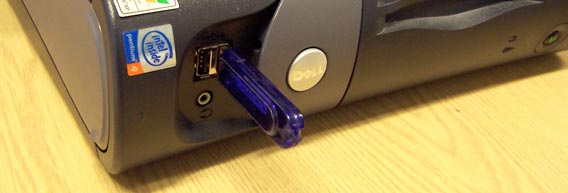
The newer Dell PCs have two USB ports on the left hand side of the system unit (which is sometimes mounted behind the flatscreen monitor):
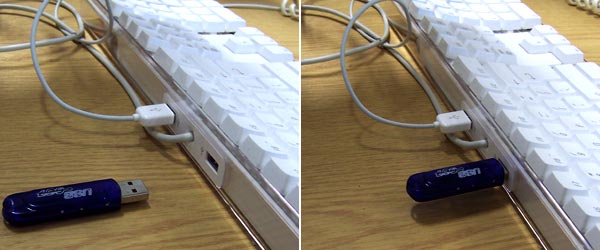
- iMac
- There is a USB port on the keyboard
IT Services cannot guarantee that any particular flash drive will work within the security limitations in place on cluster PCs, but have recommended a pen drive to the University Bookshop which does work. Several other makes tested also work; however some students have found that certain makes do not.
Using the internet
If your computer at home is connected to the Internet, you can transport files in a variety of ways:
- If it is your own files you can, while on campus, email the documents to yourself as attachments to a message that you then read at home.
- If you are off campus and want a file you have stored on the IT Services system, you can use FTP (file transfer protocol) to copy the files. This method, described below, can be used if you use the IT Services iMacs, PCs, or UNIX service.
- If the information has been published on the Internet, you can download the files directly on your home computer.
Using FTP
There are various different products available; for Windows PCs, IT Services recommend that you acquire FileZilla which is freely available to university students and staff.
You should start the application and from the File menu select Site Manager. This opens a new window. Click on the New Site button to enter details of where your files reside.
Files saved on your N:drive on an IT Services PC
- Host:
- Type unix.sussex.ac.uk
- Servertype
- Select SFTP using SSH2
- User identifier
- Type your username
The appropriate port will be automatically set when you select the server type. The example below is for chrisli:
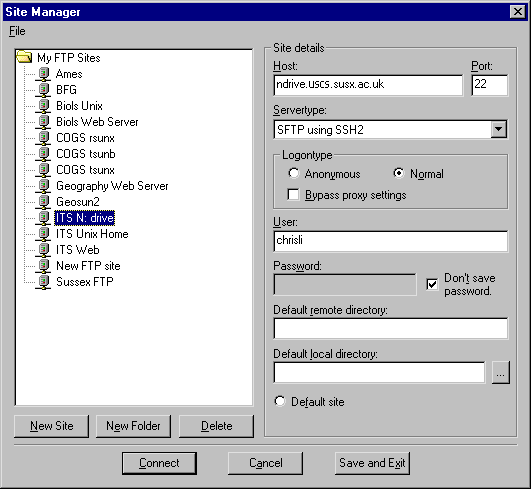
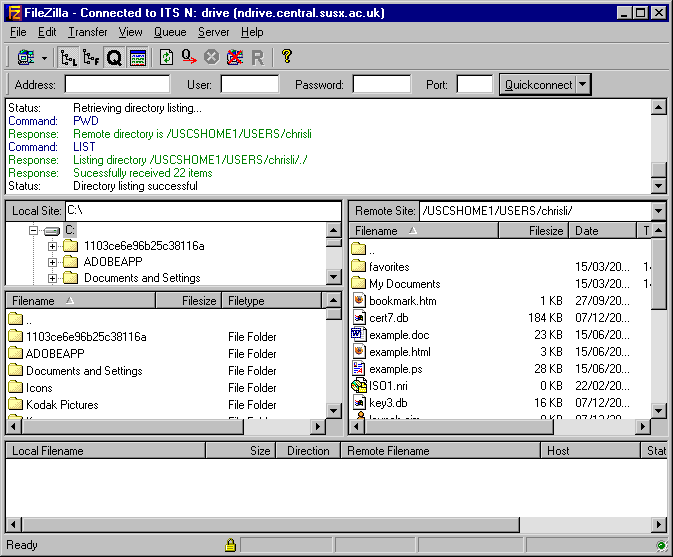
Click on the Connect button. You will be prompted for your password. If you have entered the details correctly, the window should change to show the files on the IT Services system on the right hand side as below:
iMac and Unix files
- Host:
- Type unix.sussex.ac.uk
- Servertype
- Select SFTP using SSH2
- User identifier
- Type your user identifier
The appropriate port will be automatically set when you select the server type. The example below is for chrisli:
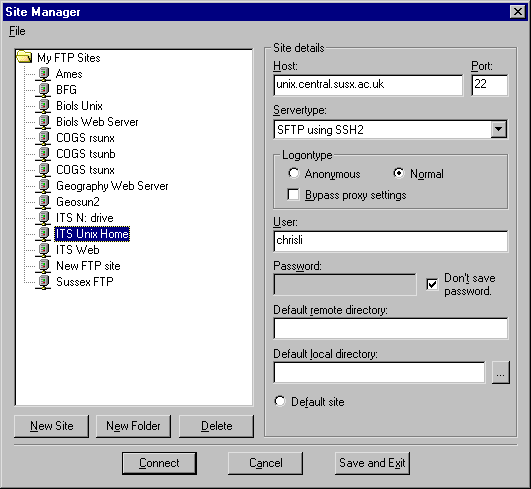
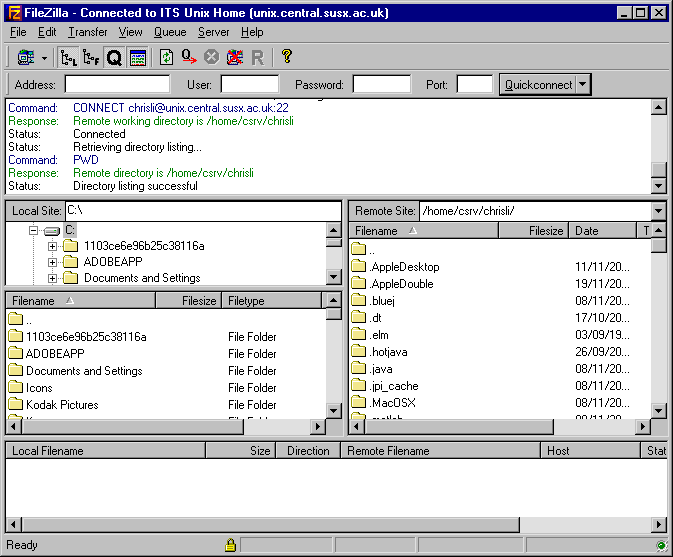
Click on the Connect button. You will be prompted for your password. If you have entered the details correctly, the window should change to show the files on the IT Services system on the right hand side as below:
Further information
There is an IT Services Guide available entitled File transfer using FTP.
Compressing files
If your home PC has neither a zip drive nor access to the Internet, it is still possible to move large files with a compression utility such as WinZip. These programs create a single "archive" file that holds several files. The archive file can span several floppy disks. You can compress the files when creating the archive. This means that the archive will need less space, and possibly less disks; the disadvantage is that it will take longer to create.
To use this method of moving large files, a suitable compression utility must be installed on both the source and destination PCs. WinZip is installed on IT Services PCs, but for your home or office PC, you may want to download and install a suitable utility from the Internet that is free, such as Zipcentral.
Your home PC may well already be set up with a Zip utility, such as WinZip, that can unpack zip files. If not, you will need to install one such as Zipcentral (see above). Ensure that you choose the correct version for your operating system, i.e. Windows 95, 98, ME, NT, 2000 or XP. You will find applications are either Freeware or Shareware, you can see this under the License heading. If it is freeware then you can download and use this application for no fee. If the application is Shareware then you can download and use the application for a set period of time after which you will need to make some form of payment.
If you have files that will not fit on a single floppy disk due to their size you can create a disk spanning zip file across multiple floppy disks. It is advisable to use blank pre-formatted 1.44Mbyte floppy disks for this procedure. To make a Zip file that spans several floppy disks you first create a Zip file on the floppy disk and then add files to the newly created Zip file. If the floppy disk becomes full while adding files to the zip file you will be prompted for another disk. Simply insert the next disk and continue.
Important: Disk spanning is not available when adding files to an existing archive; it is only available while creating a new archive. Also note that you cannot add or remove files from a Zip file that spans disks.
Examples
The following examples use WinZip on a PC running a recent version of Windows. Example 1 illustrates the steps you need to take on campus to copy the files onto floppy disks. Example 2 shows the steps to copy the files from the floppy disks onto the home (or office) computer.
1: Copying several large documents
You have a number of files e.g. documents created in Excel, Word, Access including some graphics files, say about 20 files in total located in the directory N:\My Documents. When you check via Windows Explorer you find that it collectively amounts to 1.9 Mbytes of data. Your plan is to use a floppy disk to take your work home.
The files are collectively too large to fit onto a single disk. WinZip can be used to create a disk-spanning archive as follows:
- Insert a blank 1.44 MB floppy disk into the drive
- Start WinZip (You will find it under Utilities and WinZip)
- The following window will appear
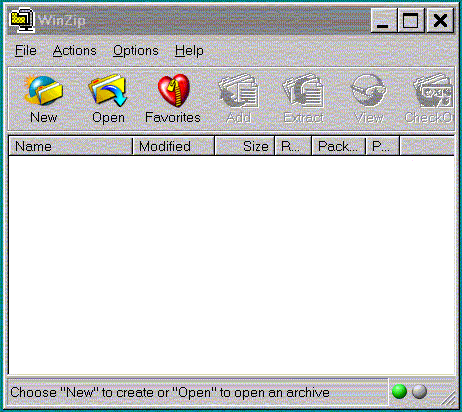
- Click on New
- In the Create_in: box select Floppy (A:)
- Type in the name for the new "zip" file, for example WORK in the File_name: box
- Click on OK
- The following dialogue box will appear
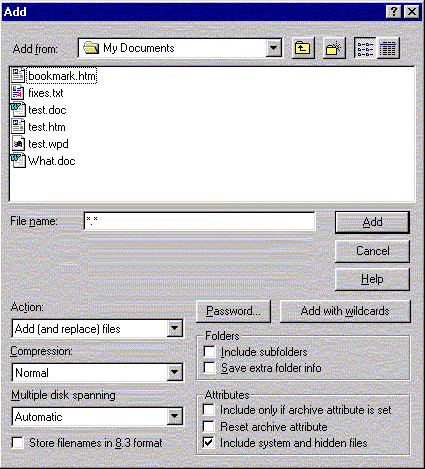
- In the Add_from: select the directory N:\My Documents
- Select the files you want to add to the zip file:
- To select all the files in the directory: click on the first file in the list and then hold down the Shift key and click on the last file
- To select specific files: click on the first file you wish to copy, hold down the Ctrl key and click on each other file you wish to copy
- Check that the Action setting is Add (and replace) files - this is the default setting
- In the Compression box, Normal is the default setting. If you wish to compress your files so as they fit into the smallest possible space, select Maximum (slowest)
- In the Multiple disk spanning box, ensure Automatic is selected
- Click on Add - the selected files will be written to the zip file on the disk
- If more than one disk is required you will be prompted to insert additional disks
- When the files have been zipped from the File menu select Exit to shutdown the application
- You now have a zip file that contains the files you selected saved across multiple disks
2: Extracting the contents from the zip file onto your PC at home
You will need an unzipping utility installed on your PC, e.g. WinZip, ZipCentral, PKUNZIP. The majority of these applications are compatible so there should not be a problem if, for example, you create a zip file using WinZip here on campus and you unzip it using PKUNZIP on your PC at home. In the example we will WinZip.
- Insert first disk of the set you created into the floppy drive
- Start WinZip
- Click on Open
- In the Look in: box select Floppy (A:)
- Click on the required zip file. It would be WORK.ZIP if you were uncompressing the files created in Example 1
- Click on Open
- You will be prompted to insert the last disk in the set, insert the disk and click on OK
- Select the file or files that you want to uncompress from the zip file
- Click on Extract
- In the Extract to: box navigate to where you would like to save your file(s), e.g. the TEMP directory
- Click on Extract
- You will be asked to insert disk 1, insert the disk and click on OK
- You will be asked to insert the other disk(s)
- When the extract operation has completed, from the File menu select Exit to close down the WinZip application
- The file(s) should now be in your TEMP directory
created on 2010-01-01 by Chris Limb
last updated on 2011-10-11 by David Guest