How to...
Producing images for the web (Photoshop Elements)
Images scanned for the web (or indeed for sending via email) are very different from those scanned for printing. Firstly they need to be smaller - not just in height and width but also in file size. Secondly they will need to be saved as one of two or three specific formats, depending upon their content.
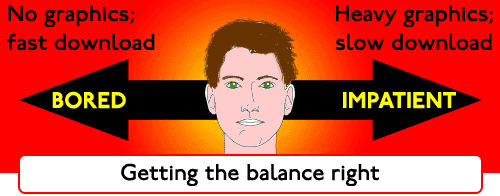
Download speed
Remember that not everyone will be viewing your page with a direct connection to the internet such that the University enjoys - many of your visitors will be using a 56k or slower modem. People surfing the web have a very short attention span and sometimes if a page isn't loaded within 10 seconds, they will go elsewhere.
The simplest way around this would seem to be to remove as many graphics as possible from your page - however people surfing the web also have certain expectations of what websites should be like, and if a page looks dull or text-heavy they might also try somewhere else. The trick therefore is to produce graphics files that are small but effective.
[a href="#top">back to top]
Scanning the image
For instructions on scanning using one of the IT Services scanning PCs in Engineering 1 or Pevensey, please see the IT Services Guide Scanning on an IT Services PC.
[a href="#top">back to top]
Editing the image
Cropping
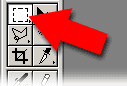
The first question to ask yourself is whether you actually need all of the scanned image displayed on your webpage. Cropping away any un-needed parts is a useful first step towards reducing file size. To crop an image select the marquee tool (right) then click and drag on the image to select that part of the image you want to retain:
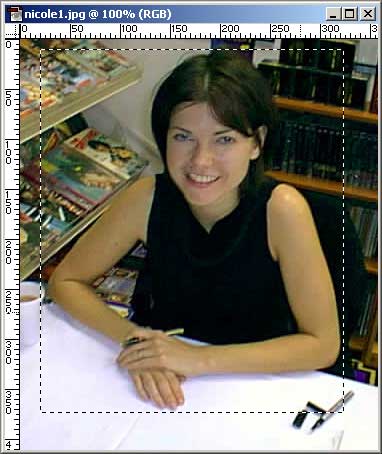

Once satisifed with the area you have selected, from the Image menu select Crop. The area of the image will be reduced to the area of your selection (right):
Resizing
Another way to reduce the file size is to use Photoshop Elements's resize option. From the Image menu select Image Size.... The following window will be displayed:

Ensuring that the Constrain Proportions option is checked (otherwise your image will be distorted) simply enter the desired Width (or Height) of the image into the appropriate box. The corresponding Height (or Width) will be adjusted automatically. Click on OK to apply the resize.
[a href="#top">back to top]
Saving the image
Once you have edited the image to your satisfaction, you will then need to decide which image format to save it in. Which format you choose depends upon the content of the image.
GIF Format
GIF (Graphics Interchange Format) is an "8 Bit" graphics format. It uses 256 colours, supports both transparency and animation. GIF files also compress "losslessly" - in that they can take up a small amount of storage space without losing any information.
You should use GIF format when images contain:
- a limited amount of colours
- large areas of flat colour
- intricate detail you don't want to lose
- transparency
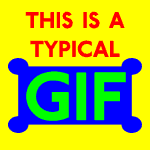
GIF files on the web generally tend to be logos or images of text and shapes.
JP(e)G Format
JP(e)G (Joint Photographics Experts Group) format is a "24 Bit" graphics format. It can use 16 million colours, and uses "lossy" compression - this means that the files can be compressed to take up a considerably smaller amount of disk space, but that information is discarded during this process.
JP(e)G does not support transparency or animation.
You should use JP(e)G format for:
- photographic images
- continuous tone images
- images with a large amount of colours
A third image format, PNG (Portable Network Graphics), also exists although it is not yet in widespread use. Developed by the WWW Consortium it is patent free (unlike GIF). Most version 4+ browsers can display PNG (although sometimes inadequately). Like GIF, PNG supports lossless compression and transparency. However, PNG can be saved in 8 and 24-bit versions, allowing GIF-like and JPG-like colour ranges.
Once you have decided in which format to save your image, from the File menu in Photoshop Elements select the option Save for Web... . The following window will then be displayed:
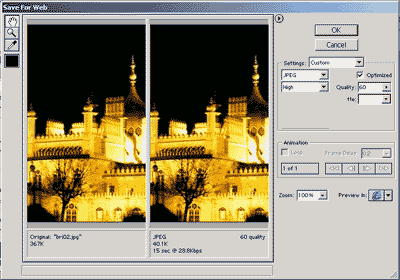
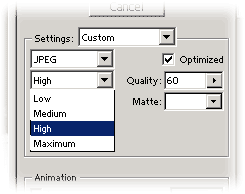
The right hand pane of the window contains the controls for setting the various file format/optimisation options, allowing you to select firstly the file format and then a range of settings for that format:

The centre pane contains a preview of the image optimised using the current settings, and the left hand pane the original image. Beneath the preview image are estimates of file size and download speed using the current settings:
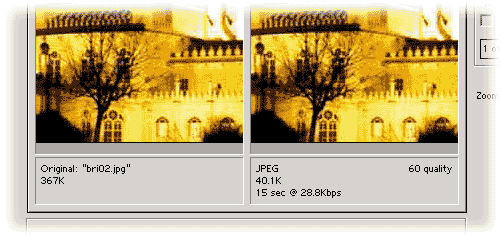
Experimentation with the various settings will allow you to reach an acceptable balance between low file size and satisfactory image quality. Once you are happy with both, click the OK button. You will then be prompted for a file name and location as in any normal Save as... dialog.
[a href="#top">back to top]
Lossless compression
Something for nothing?
At first the idea of being able to compress an image file without losing any information seems too good to be true. However, with a limited colour palette such as that used by GIF format, it can be quite straightforward.
Consider how information in an image file is stored; each pixel has to have not only its colour described but also its position. For example, a sequence of five pixels might be described thus:
| colour position |
201 1,1 |
201 1,2 |
201 1,3 |
201 1,4 |
150 1,5 |
However, it would be possible to describe this sequence using less information:
| colour position for how many pixels? |
201 1,1 4 |
150 1,5 1 |
This is a very basic description of how lossless compression works (there are other algorithms used to detect repeating patterns and other features of the image which might save space). It can be worked out from this, that images with horizontal stripes compress further than those with vertical stripes. Apart from their orientation, the following GIF images are identical. However, the one with the horizontal stripes is less than half the file size of the one with vertical stripes:
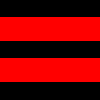 |
 |
| 216 bytes | 473 bytes |
[a href="#top">back to top]
created on 2010-01-01 by Chris Limb
last updated on 2010-06-30 by Claire Wallace