Questions and answers
2642How do I check people's availability when planning a meeting in Outlook or OWA?
Both Outlook and OWA have a facility known as the Scheduling Assistant which can help you book meetings when the required participants are free - it is also useful for seeing when rooms are available for a meeting.
Using OWA
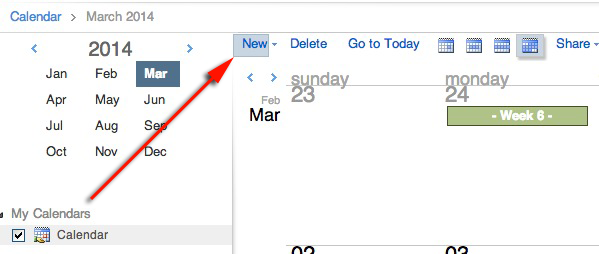
To use Scheduling Assistant, switch to Calendar view and then click on the New link towards the top left hand corner:
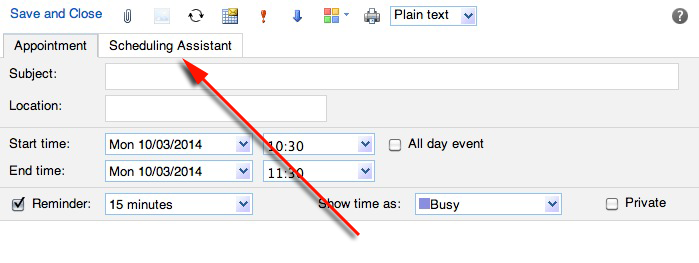
This will open a new Untitled Appointment window. Click on the Scheduling Assistant tab:
Set the Start and End times using the dropdowns provided and then start adding required participants by clicking on the Add a name link:
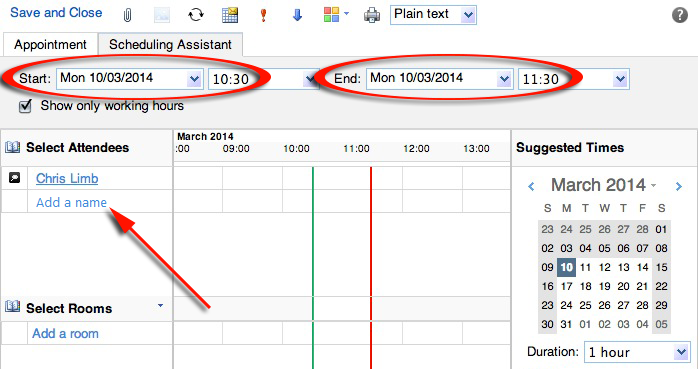
Start typing the name in and select the name when it is autocompleted. Similarly, select a room by clicking on the Add a room link, starting to type its name and clicking on it when it is autocompleted.
Busy times for all participants and for the room are indicated in the central panel as blocks. You can now select a time when the room is available which is convenient for all participants:
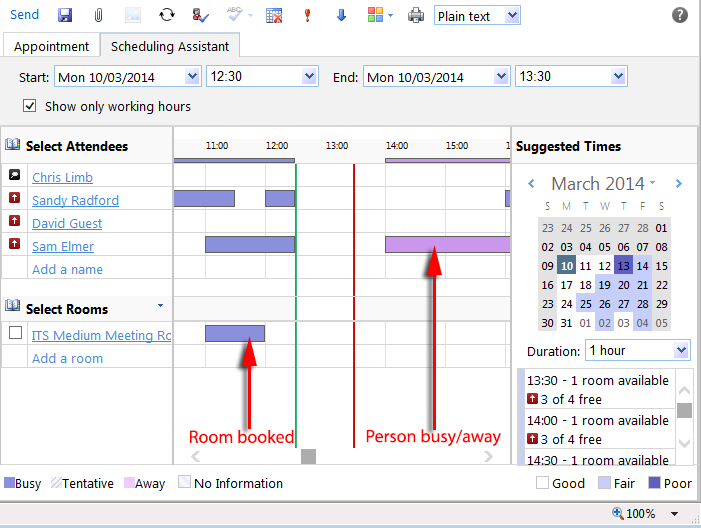
The right hand panel contains suggested optimum times when as many of the participants as possible are available.
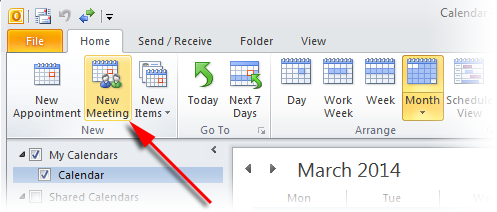
Using Outlook
The procedure for using Scheduling Assistant is broadly similar when using Outlook 2010, although there are significant differences in the interface.
To use Scheduling Assistant, switch to Calendar view and then click on the New Meeting icon towards the top left hand end of the toolbar:
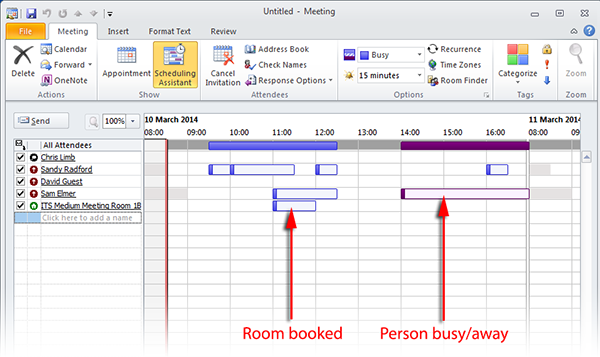
This will open a new Untitled Meeting window. Click on the Scheduling Assistant icon in the toolbar:
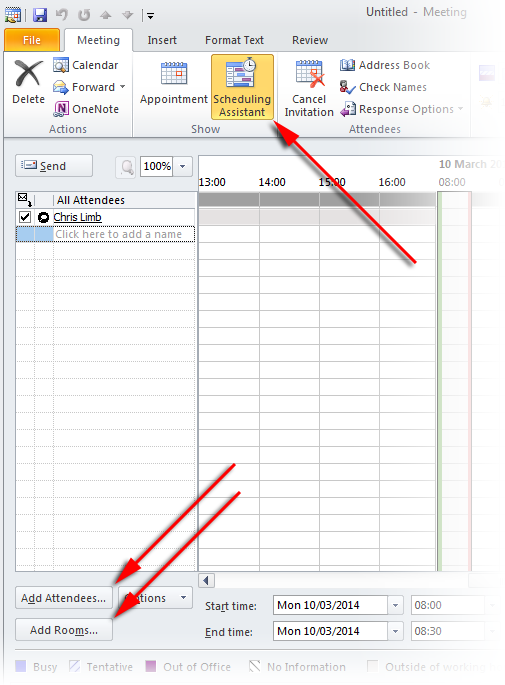
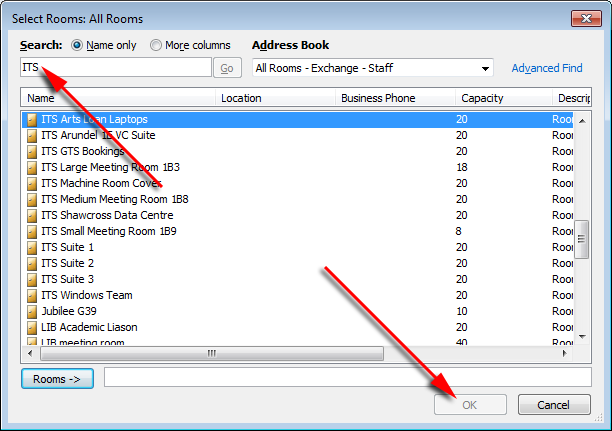
To add a room, use the Add Rooms... button towards the bottom left hand corner. This will open the Select Rooms window in which you can search for the room you need:
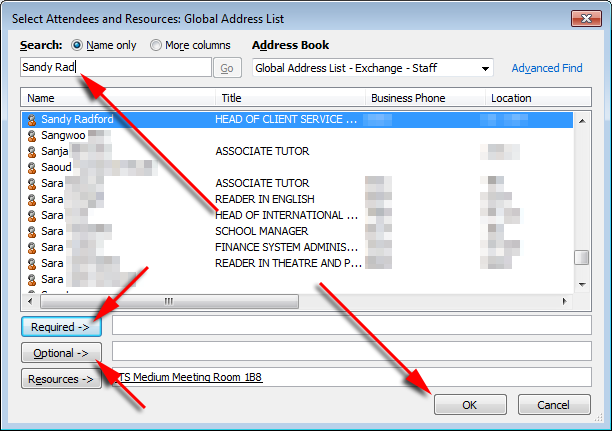
Once you have selected it, click OK and then repeat the process for attendees using the Add Attendees... button which opens the Select Attendees window.
Search for and add all the people you need. Double clicking on a person's name will automatically add them to the Required list - alternatively highlighting their name allows you to choose using the Required-> or Optional-> buttons.
Once complete, click OK:
Busy times for all attendees and for the room are indicated in the right hand panel as blocks. You can now select a time when the room is available which is convenient for all participants:
Help us to improve this answer
Please suggest an improvement
(login needed, link opens in new window)
Your views are welcome and will help other readers of this page.
Categories
This is question number 2642, which appears in the following categories: